
Welcome back to The Homesthed’s guide to buying, raising, and breeding emus. We’re so grateful you’ve decided to join us again.
So, you’ve used the tips in our previous article, Red Flags When Buying Chicks, to find the most reputable breeder you can. Whether you’ve decided to purchase eggs and incubate them or jump on a waitlist for chicks down the road, you’ve likely got a few weeks of waiting ahead of you.
Now is the perfect time to start preparing your home, barn, and/or farm for these crazy balls of energy. If you’ve ever raised chicken chicks or any other type of farm bird, you likely have a lot of what you’re going to need for the first few weeks.
The first and most important item to mention is this: Emus go from an egg the size of a softball to a 120-pound, 6-foot-tall bird in less than one year’s time. EMUS GROW FAST!! As you’re preparing your brooders and enclosures, remember this. Once you have that chick in your hands, you won’t be able to keep up with its growth if you haven’t already prepared a plan. This article is only going to discuss accommodations for chicks, but we will be addressing accommodations for juveniles and adults later.
As with most topics relating to emus, there are a lot of opinions on the items we are discussing below. This article based on the experiences we have had, but we’re always open to feedback and additional information that we can include in future articles.
BROODER
At The Homesthed, we love using a large stock tank as a brooder for all our newly hatched birds. We’ve also seen many other breeders do the same. We have several of the CountyLine galvanized stock tanks that are 2 feet tall, 3 feet wide, and 8 feet long. We’ve successfully housed many an emu chick in these tanks. They’re sturdy, easy to clean, and tall enough to house the chicks till they’re around 6 weeks old. It is a great all-purpose option for the first few weeks.
If you’re going to be hatching your own chicks, we recommend having a separate, smaller option for the first 72 hours while the chicks are still getting their legs and learning to eat and drink. We use a large plastic tote. We’ve also seen breeders use a retired cabinet incubator/hatcher, a smaller stock tank, a laundry basket, a pack-and-play, etc. There are so many options for this. This will reduce the overwhelm and allow you to ensure they’re figuring things out before you put them in a larger space.

HEAT LAMPS
Needing to provide heat to your emu chicks is going to depend on a few factors. If you’re keeping your chicks in a space that is going to consistently remain hotter than 85 degrees, they aren’t going to need supplemental heat. If you’re going to keep them outdoors and the weather is chilly (less than 75), providing a heat lamp is highly recommended for at least the first few days after hatch. We keep our chicks inside a temperature-controlled environment for the first several weeks and provide them with a heat lamp for about the first week.
A lot of breeders don’t provide a heat lamp, and we didn’t use a heat lamp for our first several emu chicks. We didn’t start using a heat lamp until we were hatching our own chicks and noticed that the first few days, 75 degrees was just too cold, and they were shivering without the heat. The most important thing is to watch their behavior to determine if they need more warmth or not.
BEDDING
This is another extremely important item of concern when raising emu chicks. If you’ve done any small amount of research, you’ve probably learned that emu chicks are extremely prone to splayed legs and slipped tendons if they do not have proper, non-slip, bedding for the first several months of their life.
In our small brooder for the first 72 hours of the chick’s life, we use thick towels as bedding. This is before they’re standing and walking around, and we like having a surface that provides contrast against the food and water dishes so the chick can learn to eat and drink quickly.
Once the chicks are a bit older and we move them to the next brooder, we use large flake pine shavings. We love using pine shavings because they help with odors, they are extremely absorptive, they’re totally non-slip, they’re inexpensive, and they’re easy to clean up. If you’re going to use pine shavings, use a depth of about 6” to ensure the emus will be at no risk of slipping. We’ve heard of some placing turf, or a rug, cut to the size of the brooder beneath the shavings to provide an additional non-slip surface as well.
Some additional options are coarse sand, straw, turf, rugs, or anything else that will be totally non-slip and easy to clean. Another important point to make here is that emu chicks poop a lot. You have likely never raised an animal that is going to poop as much as an emu, so you’re going to want your bedding to be easy for you to clean once or twice a week until your emu has moved out into a larger space.
FEEDERS & WATERERS
We have tried so many different options for feeders and waterers for both our emu chicks and adults. These birds are messy, they love to step in everything, and they love to dump stuff over any opportunity they get.
The best feeder option we have found to date is a galvanized, weatherproof chicken feeder. We love this because they can’t step in it, they can’t poop in it, and they can’t knock it over. As they grow, we put it up on a cinder block so that it is still accessible for their long necks. It also allows us to provide them easily with free-choice feed while they’re growing.

As for waterers, we haven’t really come up with any fool-proof method for chicks up to this point. The most unique part of raising emus is that they need a waterer that they can scoop out of. Standard chicken waterers don’t provide this ability. For the first few days, we use a white glass bowl while they’re still learning to drink. Once they’re graduated to the larger brooder, we opt to use a standard gravity waterer that you might use for a cat or dog. It allows us to give them free access to water while also allowing them to scoop their water. You’re going to have to clean this out every day or two because they will step in it and poop in it, no matter how out of reach you think it is. As they grow taller, we will elevate it on a cinder block, so it becomes more difficult to step in.

FOOD, TREATS, AND SUPPLEMENTS
We’re going to do a separate article diving into feeding your emus a little more, but here we will discuss what we feed our little ones while they’re young. As mentioned in the section above, we provide free-choice feed to our emus for the first three to four months of their lives. It is important that they have more than enough food to sustain their quick growth.
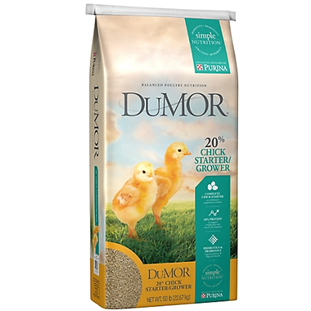
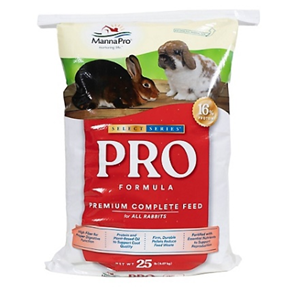
Our emu chicks, from hatch to around 6 to 10 months of age, will receive a mix of half 20% Chick Starter and half alfalfa-based extruded rabbit pellets. We personally use the Dumor Chick Starter/Grower and the Manna Pro Select Series Pro Formula Rabbit Feed. I also love the Blue Seal Show Hutch Rabbit feed as well, but unfortunately our local feed store doesn’t consistently supply it.


Providing your chicks with an alfalfa-based rabbit feed such as those mentioned above is going to save you a lot of watery poops as well. The fibrous nature of the pellets will help make their poop a little more solid. If you ever feel that their poop is too watery for your taste, you can always add more of the rabbit pellets.
There are a few supplements that we recommend including in their daily routine, and a few others we recommend having on hand in case of emergency. For those that should be incorporated into their daily routine, we recommend the Rooster Booster Poultry Booster Pellets mixed into their feed and a liquid vitamin B complex (for humans, from Walgreens/CVS/etc.) mixed into their water. Before this last spring, we did not use a vitamin B complex in our emus’ water, but we purchased a chick from a new breeder, and she ended up with severe wry neck which is an indication of nutrient deficiencies. Going forward, we will always use vitamin B in our chick water for the first four to six weeks, and we recommend you do as well.


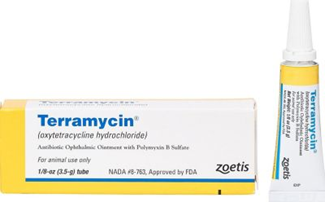
As for items to have on hand in case of emergency: injectable vitamin B complex (with needles and syringes), terramycin (eye medication), and CoraCue Immune Support (for human babies). If you can get an oral antibiotic such as amoxicillin or ciprofloxacin, those may come in handy, but they typically require a prescription. Have a vet on speed dial if at all possible, in case you need it.


The final item in this section to discuss is treats or food items that do not need to be fed every day but work great as enrichment and extra nutrition. KALE KALE KALE. Once again, if you have done any research, you’ve probably heard about kale the miracle vegetable for emus. Many people feed kale regularly due to the immense benefits, but for some it is a lot of work to incorporate into an everyday diet. In addition to kale, you can feed just about any fruit or vegetable in moderation. Blueberries, watermelon, cheerios, mango, meal worms, etc. Some even recommend dog food as an occasional treat for their birds. The more you introduce your chicks to when they’re young, the more they’ll be willing to try new things as adults!
OTHER ITEMS
There are a few other “random” items that you’ll want to have on hand for raising your new babies. The first is athletic tape. Inevitably, at some point, you will have an emu chick that begins to show signs of splay leg. This can happen for so many reasons, and many of them aren’t preventable. Having athletic tape on hand for hobbling is going to be a life saver.
Depending on your goals for the future, you may want a reliable way to tell your emu chicks apart until they’re old enough for a more permanent solution for identification. Until the chicks are a couple months old, you can use colored zip ties. They chicks are easy enough to hold down to remove and replace the zip ties. After a while, that just won’t be practical anymore. Our solution to this was purchasing livestock spray paint. We bought every color available and use it to identify blood lines, gender, etc. You do have to reapply as if fades, but it’s the easiest option we’ve identified so far.
This concludes our second article in our Guide to Emu Owning. As mentioned above, if you have any feedback, additional suggestions, or questions, don’t hesitate to contact us. We would love to include additional information in a future article.
Thank you for supporting The Homesthed!
RECOMMENDED PRODUCTS:
Stock Tank
Feeder
Waterer
Feed
Supplements
Other Items
Comments